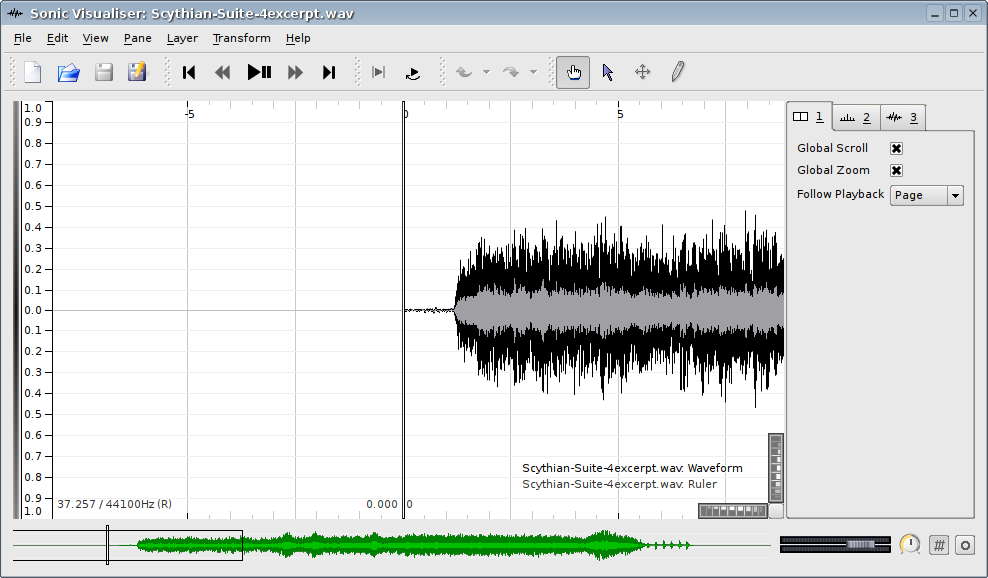
For this task we will be referring to this excerpt from the fourth movement of Prokofiev's Scythian Suite (Désiré Defauw / Chicago Symphony Orchestra 1945, transferred from RCA Victor 78 by Bill Anderson).
Open Sonic Visualiser, and import the audio file.
Playing this piece from the start, you'll notice there are three "humps" visible on the waveform at around 11, 12.5 and 16.5 seconds that correspond to repetitions of a short wind motif. We'll take a closer look at the first of these.

Scroll so that the first hump is visible, and zoom in a few times
using the mouse wheel or Up cursor key. Then switch to the Select
tool by clicking the arrow  button on the
toolbar, and drag to select an area approximately from the start of
the first hump to shortly before the second.
button on the
toolbar, and drag to select an area approximately from the start of
the first hump to shortly before the second.

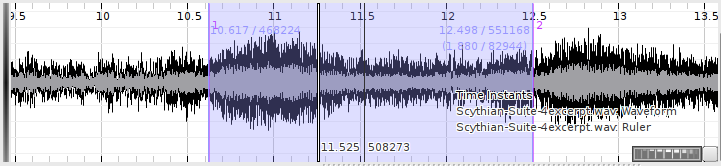
As you see, the program is telling us that this selection covers a range from 10.617 seconds up to 12.498 seconds, or 1.88 seconds later. Your exact figures will probably vary, of course.
You can adjust the extents of the selection after having initially selected it. Just click-and-drag the left or right edge of the purple selection region (first making sure you have the Select tool active).
Let's listen to the selected area. Click the  toolbar
button, and then play. If the current playback point is in the middle
of the selection, Sonic Visualiser will play from it to the end of the
selection; if you then Play again, you'll hear the whole selection and
nothing else.
toolbar
button, and then play. If the current playback point is in the middle
of the selection, Sonic Visualiser will play from it to the end of the
selection; if you then Play again, you'll hear the whole selection and
nothing else.
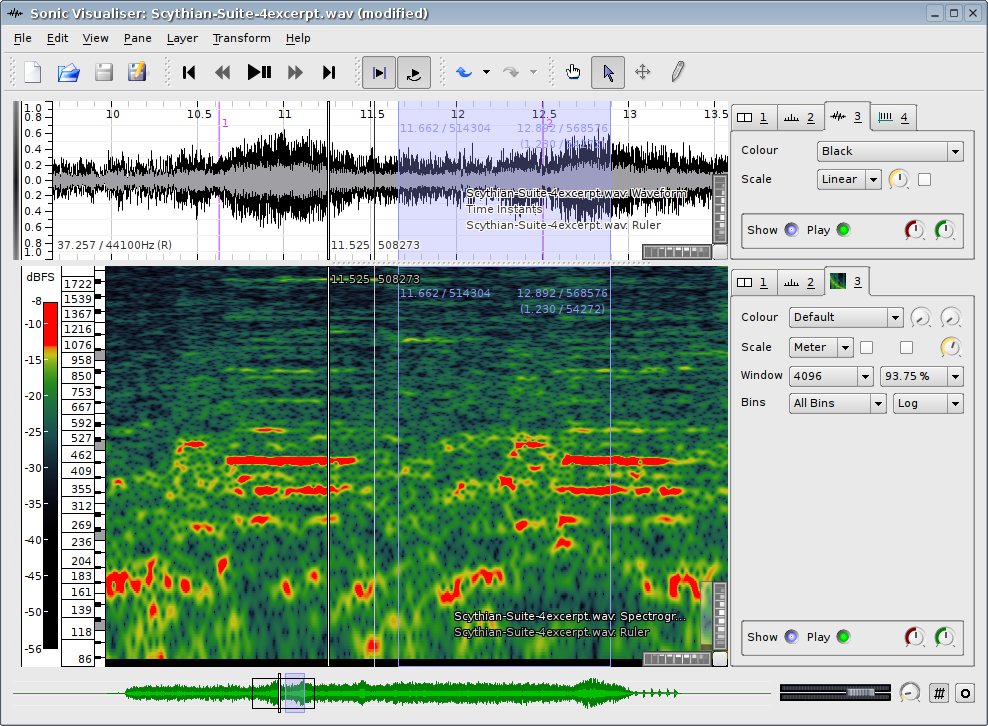
Adding a spectrogram view will give us another way to look at what's being played here. Use Pane -> Add Peak Frequency Spectrogram:
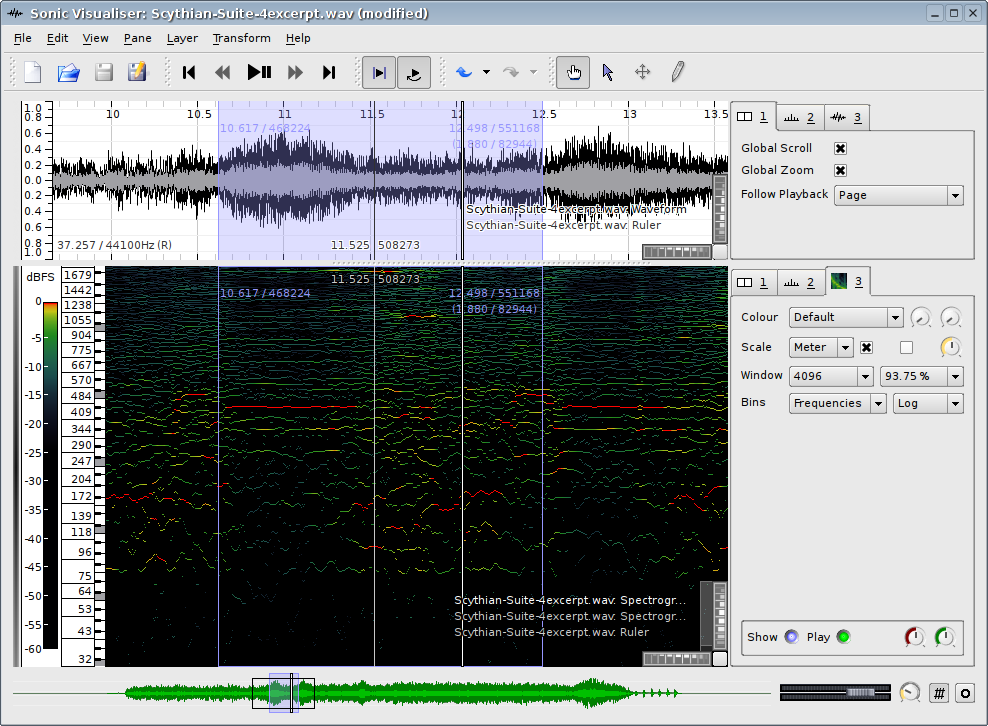
You might like to change some of the properties of this spectrogram for a clearer view.

Here we've changed the Bin Display property from Frequencies to All
Bins, changed the Colour Scale from Linear to Meter, switched off
Normalize Columns, and increased the Gain dial to make quieter regions
more distinguishable (at the cost of blowing-out the loud red areas).
We also dragged the spectrogram pane downwards to admit a slightly
higher frequency range. (If you want to do that, first switch back to
the Navigate tool  on the toolbar so
that you can drag around the spectrogram without disturbing the
selection.)
on the toolbar so
that you can drag around the spectrogram without disturbing the
selection.)
Now click the  toolbar button to
loop the selection, and then play again. Playing a short loop like
this for any length of time will probably drive you crazy, but try it
anyway.
toolbar button to
loop the selection, and then play again. Playing a short loop like
this for any length of time will probably drive you crazy, but try it
anyway.
While it's playing, let's slow it down and so listen more closely to what is actually being played. To do this, use the playback speed dial at the bottom right of the Sonic Visualiser window.
Click on this dial and drag downwards or to the left to slow down playback. You can also use the mouse wheel to change the speed (move the mouse over the dial and roll the wheel towards you) or double-click on the dial to enter a particular speed directly.

Sonic Visualiser can slow the music to any speed right down to a tenth of its original speed, which is likely to be too slow to follow the notes properly. About a quarter speed (with the dial pointing roughly left) is likely to be clearer.
Although a selection is just a temporary thing -- when you select a region, any previous selection is forgotten -- Sonic Visualiser is able to refer to annotated time instants when making a selection, so you can recall a precise area on demand.
Let's add some time instants at the extents of this selection, and then use them to recall it later. Click on the top pane (the waveform) and invoke Edit -> Insert Instants at Selection Boundaries. Then press Escape to clear the selection.
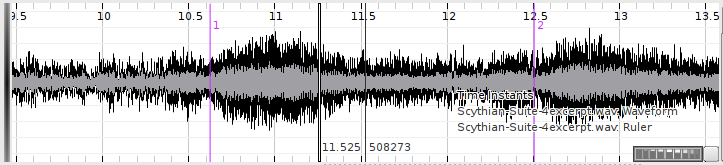
You'll see the new Time Instants layer, and the two new (purple) vertical lines labelled 1 and 2 which are positioned at the extents of the selection you had. Unlike the transient selection, these instants can be edited or relabelled, can have their positions exported to a text file, and so on.
If you now switch back to the Select tool and click anywhere between these two lines in
the top pane, you'll see that the whole region between the lines is
selected, restoring the selection you had previously.
A selection always "snaps" to the positions of any features in the topmost layer you drag the selection out on. Thus, if you want to select a region that doesn't snap to these points, you should raise the waveform or ruler layer to the top first by clicking on its tab in the layer properties area.
You can then freely drag out a new selection.
That's all we're covering in this short tutorial.